If you’re new to music production and wondering how to play music with GarageBand beginner, you’ve come to the right place. GarageBand is a powerful yet easy-to-use tool that lets anyone create, record, and produce music, even without prior experience. In this guide, we’ll walk you through the essential steps to get started, so you can confidently play music, explore virtual instruments, and build your very first songs using GarageBand. Whether you have a Mac, iPhone, or iPad, this beginner-friendly tutorial will help you unlock your musical creativity quickly and effortlessly.
What Is GarageBand (In Simple Terms)?

GarageBand is Apple’s free digital audio workstation (DAW) that lets you:
- Play virtual instruments (like piano, drums, and guitar)
- Record your voice or real instruments
- Arrange and edit songs using loops or your own recordings
- Add effects and mix your music
- Export and share your finished tracks
Whether you want to make beats, write a song, or record a podcast — GarageBand is a great place to start.
Why Choose GarageBand as a Beginner?
Before we get into the how, here’s why so many beginners choose GarageBand:
- Free and comes pre-installed on all Apple devices
- User-friendly interface with drag-and-drop simplicity
- Tons of pre-built sounds, loops, and instruments
- Works for all kinds of music: pop, hip-hop, EDM, rock, and more
- Allows real and virtual recording (you can plug in your guitar or just use your keyboard)
- Easy to learn, but powerful enough to grow with you
How to Play Music with GarageBand (Step-by-Step for Beginners)
Let’s start making music!
1. Open GarageBand and Create a New Project
- Open GarageBand from your Mac’s Applications folder (or download it from the App Store if needed).
- On the startup screen, click “Empty Project” → then click “Choose”.
- You’ll be asked to select a track type.
Choose one of the following:
| Track Type | Use For |
| Software Instrument | Playing virtual instruments (keyboard, synth, etc.) |
| Audio (Microphone) | Recording your voice or a real instrument |
| Drummer | Auto-generated drum beats |
For now, choose Software Instrument → click Create.
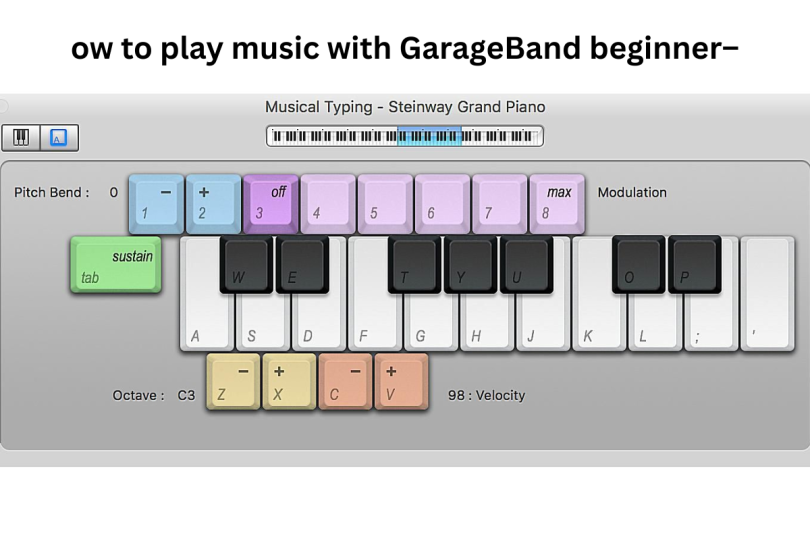
2. Play Virtual Instruments Using Your Keyboard
Once the track loads, press Command + K to open the Musical Typing Keyboard.
Now your computer keyboard works like a piano. Here’s a quick layout:
- A, S, D, F, G = white keys
- W, E, T, Y = black keys
- Z/X = lower/higher octave
You can now play and hear sound as you press the keys.
3. Choose and Customize Your Instrument
On the left sidebar (Library), you’ll see categories like:
- Piano
- Synthesizer
- Bass
- Strings
- Drum Kits
Click any category to load a new sound. Try a few and find something you like.
You can even customize effects like reverb and EQ using the Smart Controls (press B to open).
4. Add Loops and Beats
GarageBand has a massive library of Apple Loops (pre-made recordings) you can use.
To add loops:
- Click the Loop Browser (top-right icon that looks like a rollercoaster loop).
- Filter by instrument, genre, or mood.
- Click a loop to preview it.
- Drag and drop it into the timeline.
This is a great way to build a full song without needing to play everything yourself.
5. Record Your Performance
Once you’re ready to record:
- Press the red Record button or press R on your keyboard.
- Play your part using the typing keyboard or MIDI controller.
- GarageBand will record your notes in real-time.
Need to fix mistakes? Don’t worry — we’ll get to editing next.
6. Editing and Arranging Your Music
GarageBand makes editing super easy with visual blocks (called regions).
You can:
- Click and drag regions to move them
- Split regions (Right-click > Split at Playhead)
- Quantize your playing (corrects timing mistakes — in the region editor)
Arrange your song by copying and repeating parts to build verses, choruses, and intros.
7. Mixing and Adding Effects
Once your parts are arranged:
- Use the Mixer (press M) to adjust volume, pan (left/right balance), and more.
- Click Smart Controls (press B) to add effects like:
- Reverb
- Compression
- Delay
- EQ (equalizer)
- Reverb
These help polish your sound and make it feel more professional.
8. Export Your Song
Ready to share your masterpiece?
Go to:
- Share > Export Song to Disk → choose MP3 or WAV
- Or Share > Song to Music to add it to your Apple Music library
Name your track, choose the file format, and click Export.
You just made a song in GarageBand!
You may also like to read these posts:
Music Theory Basics for Songwriters: The Complete Guide (With Benefits & Drawbacks)
The “Top 100 Songs of All Time List”: A Deep Dive
The Best Productivity Apps for Remote Workers: A Deep Dive into What Works (and What Doesn’t)
Best Gaming Laptops Under $1000 Casual Gaming: Your Ultimate 2025 Guide
Benefits of Using GarageBand as a Beginner
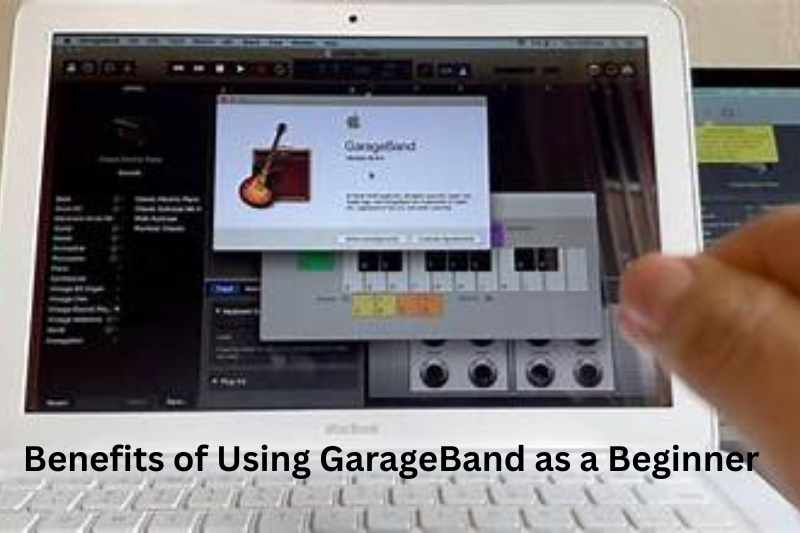
Here are some of the biggest reasons to love GarageBand:
1. It’s Free
No subscriptions, no extra costs — just download and start making music.
2. Beginner-Friendly Interface
GarageBand is clean, visual, and intuitive. No complex menus or steep learning curve.
3. Wide Range of Sounds
With hundreds of built-in instruments, loops, and sound effects, you’ll never run out of ideas.
4. Portable Music Creation
GarageBand is also available on iPhone and iPad — perfect for on-the-go creativity.
5. Good Enough for Real Songs
Many pro musicians started with GarageBand (even Rihanna and T-Pain have used it!).
Drawbacks of GarageBand (To Be Aware Of)
GarageBand is great — but it’s not perfect. Here are a few limitations:
1. Mac/iOS Only
If you’re on Windows or Android, you’re out of luck — GarageBand is exclusive to Apple.
2. Limited Advanced Features
For serious producers, GarageBand lacks deep features like full MIDI routing, advanced mixing tools, or multi-output setups.
3. Limited Plugin Support
You can’t use as many third-party plugins compared to pro DAWs like Logic Pro, Ableton, or FL Studio.
4. Not Ideal for Complex Projects
If you’re scoring a film or mixing a full album, you might hit some workflow limitations.
But for a beginner learning how to play music with GarageBand, these are usually not a problem.
Pro Tips for Beginners
- Use headphones when recording to avoid feedback
- Name your tracks to stay organized
- Save your project frequently (Command + S)
- Use Command + Z to undo mistakes — don’t be afraid to experiment
- Watch tutorials on YouTube for visual learning
Final Thoughts: You Can Do This!
Learning how to play music with GarageBand (beginner style) is one of the easiest ways to start your music journey. With just a laptop and a bit of curiosity, you can:
- Play instruments
- Build full songs
- Record your voice
- Share your music with the world
Don’t worry about being perfect — just start playing, and the skills will come with time.
GarageBand gives you a creative playground to explore music, even if you’ve never written a note before.
FAQs
1. Is GarageBand free to use?
Yes. GarageBand is completely free and comes pre-installed on most Apple devices, including Macs, iPhones, and iPads. You can also download it for free from the App Store if it’s not already installed.
2. Can I use GarageBand on Windows or Android?
No. GarageBand is only available for Apple devices. There is no official version for Windows or Android. If you’re using those platforms, you can try alternatives like Cakewalk (Windows) or BandLab (Android/Browser).
3. Do I need to know music theory to use GarageBand?
Not at all. GarageBand is designed for beginners. You can create songs using loops, play virtual instruments with your keyboard, and build beats without knowing how to read sheet music
4. Can I plug in a real guitar or microphone?
Yes. If you have a USB microphone or an audio interface, you can plug in guitars, mics, or other instruments and record them in GarageBand. You can even apply amp effects and filters to your recordings.
5. What’s the difference between a Software Instrument and an Audio track?
A Software Instrument is a virtual instrument (like piano or synth) that you play with your keyboard or MIDI controller.
An Audio track is for recording live sound — like your voice or a real guitar.